Welcome to Using Openstack on ISCA
Overview
This course will give you an introduction into the Openstack Cloud Environment. OpenStack allows you to set up a private computer within the University’s new HPC facility: ISCA. Click here to learn more about OpenStack
Several other courses in our series will use OpenStack and you may later use it for your own research.
Objectives
By the end of this section you will be expected to:
- Log into the Exeter HPC ISCA OpenStack Console and start your instance of the appropriate workshop.
- Log in to the OpenStack instance from your own computer.
- Be ready to start the tutorials at your own pace.
Roadmap to this course
We are going to introduce a lot of new concepts. This page is aimed to give you an overview of the 3 steps you need to start your course.
You should have received a document containing the passwords and other information which is specific for your course (e.g. Linux, Genomics, RNA Seq) - when running through the OpenStack module it is necessary to substitute the information in the course notes with the appropriate information given to you in the document.
1. Openstack Console
- First log onto the OpenStack console: https://openstack.exeter.ac.uk
- Use the information in the OpenStack Console section of the provided document to log on.
- Follow the sections “Introduction” and “Tour of OpenStack Cloud” in the course material.
2. Create your training Instance.
- Follow the sections “Create our Instance” in the course material.
- Use the information in the “OpenStack Image” section of the provided document.
3. Login to your instance.
The course notes explain 3 ways to connect to your instance (X2Go, PuTTy and MobaXterm). You only need to use one of these.
Managing Your Instance.
Here are some instructions on how to stop and start your instances at the start of end of each session
Managing OpenStack
Introduction
For this workshop we will provide an overview of the internal OpenStack cloud, part of the £3M ISCA HPC system and see how, as researchers, we can use this flexible resource to get work done quickly and relatively inexpensively.
You can learn more about ISCA at http://www.exeter.ac.uk/research/hpc/about.
You should be able to access ISCA and all of the functionality below via your own account to do your research. The aim of this workshop is to give you an introduction to OpenStack and Unix so you are ready to take full advantage of its capabilities!
Firstly some concepts and terminology might be confusing so here is some explanation of the advantages of using OpenStack.
Some Terminology
An Image: This is the starting point or template for the course. Think of it as a master copy of the computer which contains all the programs and data that are required to follow the course. We will use it as a template to start your own Instance.
An Instance: Almost the first thing you will do is create your own copy of the image - we call this an instance or a virtual machine. It contains everything that was in the image plus any files you create during the course.
A Volume This can be thought of as an additional hard disk which you can add or remove from an instance.
Remote Desktop We can’t plug a monitor and keyboard into a virtual machine (instance) so we need a program on our computer which connects to the instance allows us to see and control the instance from our desktop. In the course we will use a program called X2Go.
Command Line Client It is not really necessary to connect to an instance using remote desktop software. It is possible to connect only via a command line interfaces - you will not get any menus, icons images - you will only be able to type commands to tell the instance what you want to do.
Why OpenStack
Why do we use OpenStack rather than setting everyone up with a physical server?
Physically 24 computers in the data centre are available for us (and other reaseachers) to use. We could limit the course to 24 and allocate trainees one computer each. While they are scratching their heads trying to understand a new concept their computer is doing nothing. OpenStack takes advantage of this and allows us to have much more flexibility - it allows us to pool the 24 physical machines and then subdivide the pool into what are called virtual machines or instances. We can start more virtual machines than there are physical machines, sharing resources like disk space, memory and processors in whatever way we decide. We can even allocate more total processing power to the virtual machines than is actually available. Providing they are not all fully utilised at the same time it appears to everyone that they have a powerful machine all to themselves.
Are there other advantages?
With the OpenStack/Virtual Machine approach, you can let other people do the hard work for you. There are hundreds of machine images available, configured with just a basic operating system, or suites of programs to model weather, analyse genomes or model complex systems. You can find just one list here https://docs.openstack.org/image-guide/obtain-images.html Or you can create and share your own server images! If you’ve created code or an analysis which a collaborator needs, you can supply them with the OpenStack image (and any associated volumes) and they can run them on their desktop, OpenStack or on a public cloud such as Amazon EC2.
One of the most useful feature is the ability to add storage ‘on-the-fly’ by attaching a Volume to a running instance. Imagine the pain you have to go through if you want to add storage to a physical server. Also, you can increase the processing power and/or RAM of an instance at the click of a button! Is that genome assembly running out of memory? No problem! Right click on the instance, up the amount of RAM and restart it.
In addition, if you are a proficient coder and are creating parallelised code, you may want to test it on a small virtual cluster before moving it to a full cluster. Clusters of any size can be created at the click of a few buttons with OpenStack and can be configured to run Hadoop, MapReduce and many other types of distributed computing.
In the following sections you will
- Log into the OpenStack management console
- Start up your own copy (an Instance) of the pre-prepared Image for this workshop.
- We will give you a whirlwind tour of the features of the ISCA OpenStack cloud.
- Then remote desktop softare X2Go to connect to your own private instance.
Other material
For this tutorial I borrowed documentation from the following sites:
Tour of ISCA OpenStack Cloud
In this section of the workshop we will log into Exeter’s OpenStack cloud.
Logging Into the Console
In addition to being extremely comprehensive, the Exeter OpenStack cloud has a relatively easy (but detailed!) interface for interacting with its offerings. All you have to do is log in via a web-browser and most of the functionality of the is available for you and relatively easy to use.
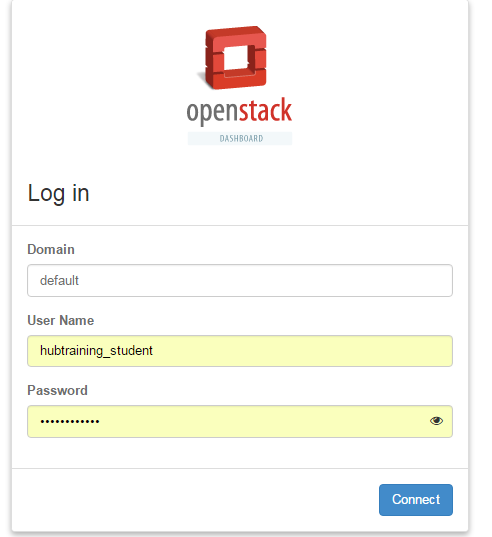
To get started go to the following URL and login with the domain, username and password distributed in the welcome email or given to you by your instructor.
We have set up a single account which we use for training. Please do NOT abuse this account. You will all log in to the same management console and will be able to see machines which your friends and colleagues on the course will start.
https://openstack.exeter.ac.uk
We can now take a look at the various services. These include:
Compute:
The service OpenStack is known for. It enables you to create Linux and Windows Virtual machines. Best of all their computational and/or disk capacity can be increased or decreased at the click of a button! This section has most of the things we need for this course.
- Instances: This is the list of virtual machines that have been created.
- Volumes: A storage unit. These can be created and attached to any compute which you have running. Ideal for moving large amounts of data between machines. Think of it as a removal hard drive which you can attach to any machine.
- Images: These are the templates from which you create instances.
Other Items of interest.
-
Object store: This is another type of storage, but is relatively slow. It is ideal for archive or when storing large files (i.e. several Gb).
-
Compute clusters: A way of linking and managing groups of Compute instances to act as a cluster. Yes - you can create your own private cluster!
-
A ton of other services that are geared towards building highly scalable and fault-tolerant web-based services. Many can be co-opted for use in research!
After logging in you’ll be presented with a wide range of options.
Click on “Compute”” and then “Overview” at the top left.
On this page you’ll get a summary of the state for your account. You can see an example below. Note that we are using a shared account where you’ll also see everyone else’s instances. If you were using your own Isca account, you would only see your instances (or that of your research group).

You see here that we have a certain allocation of resources (memory, disk space, CPUs). We can choose how to allocate these to accomplish our scientific goals. For instance, we may need one very large machine with lots of resource to do a single task (e.g. a genome assembly). Or we may want lots of smaller machines, each doing a small task (e.g. a webserver and a database server). We may want half the machines running Unix and the other half running Windows. The point is, we are in control of the compute and can choose what suits us best and it can all be done, by us at the touch of a button.
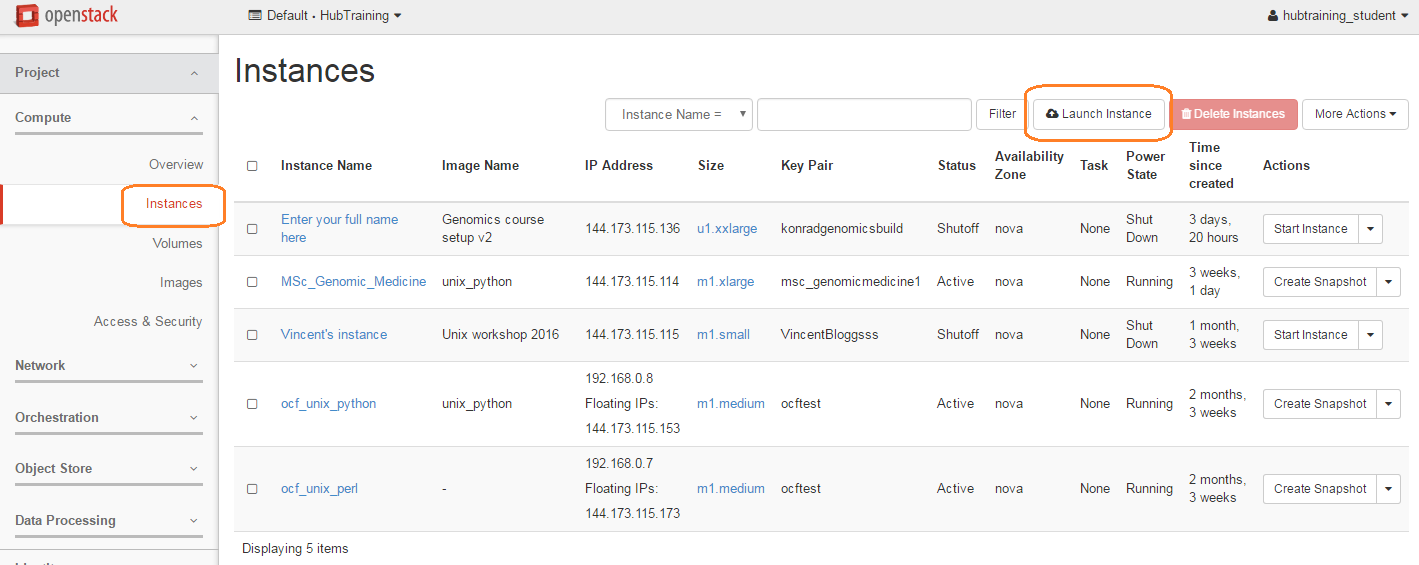
Click on “Compute” and then “Instances” at the top left.
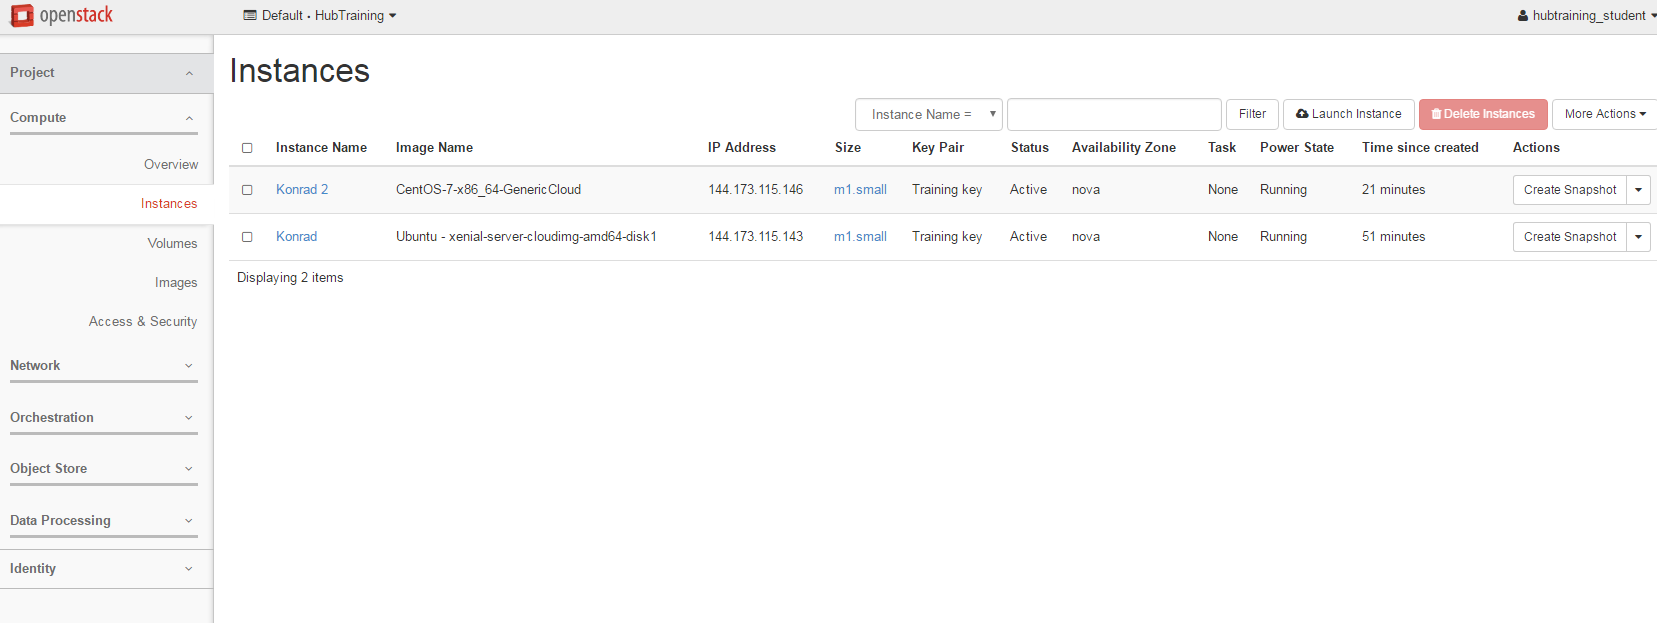
Ok, so how do we actually do all this? Well, from this page we can create our own servers on Exeter’s cloud using an image of a machine we have created earlier for you. Servers which are created in this manner are called ‘Instances’. We can create as many servers as we like, start them, log-in to them, do some work, transfer data to/from them or destroy them altogether. We let the IT team worry about the hardware, power, cooling and maintenance - all we need to do is specify how powerful a computer we want (tiny, small, medium, large or extra-large).
The reason we are using the cloud here is that many of you have to analyse large datasets. But you only need to cruch those datasets occasionally. In the case of high-throughput sequencing data (e.g. Illumina) you will find that your desktop PC may not be powerful enough to cope with the data. Also installing and configuring many pieces of software (often written by other scientists), is frequently painful as they often require other programs (also often written by other scientists) to be installed as well. Factor in some obscure incompatibility and you can quickly end up in a situation where two programs that you need refuse to co-exist. With OpenStack, you can just start a server instance based on an image created by someone else who has already done all the hard work of installation and configuration.
So let’s get on and launch our first instance!
Creating Our Instance
In this section of the workshop we will create our Instance in Exeter’s OpenStack cloud.
If you have an instance from a previous session do not create another one. Please go to the Managing OpenStack page and restart your existing instance.
Otherwise let’s get on and launch the instance we need for our workshop !
Click on the “Launch Instance” button in the centre.
Give your instance your name (e.g. “Joe Blogg’s instance”)
Remember that everyone is sharing the same logon - so you will need to be identify your instance from everyone elses.
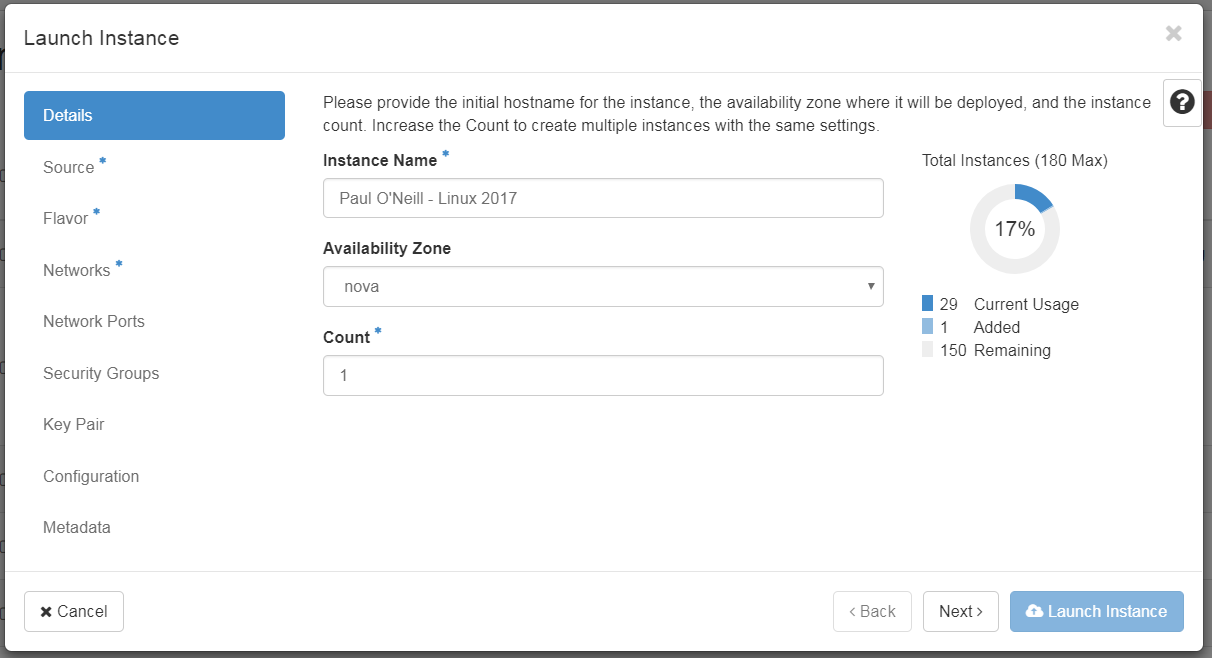
Click ‘Next’
Now we need to choose the image of the machine we want to replicate.
We have prepared a machine image or snapshot for this course which contains the relevant data you’ll need.
Refer to the instructions you have been provided for this course and don’t copy the example below exactly!
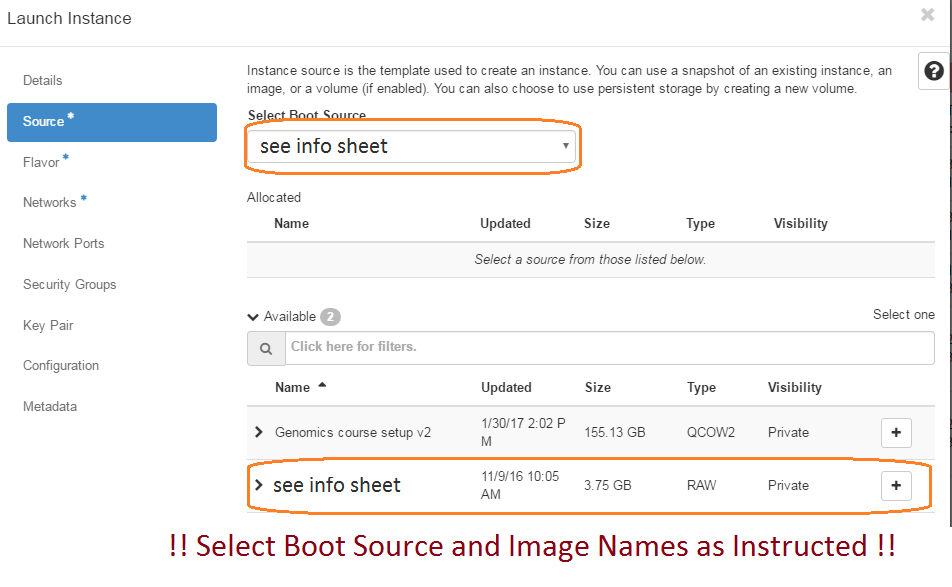
The page should now look like this:
Please make sure you select the correct machine image for this workshop!

Click ‘Next’
Here we’re going to decide on the size of the server instance we want to create. You’ll see we have a variety of ‘flavours’ or options available.
Select the “flavour” as below by clicking on the plus sign next to it

Click ‘Next’ to move on to Network selection
Select the public Network, as highlighted below.
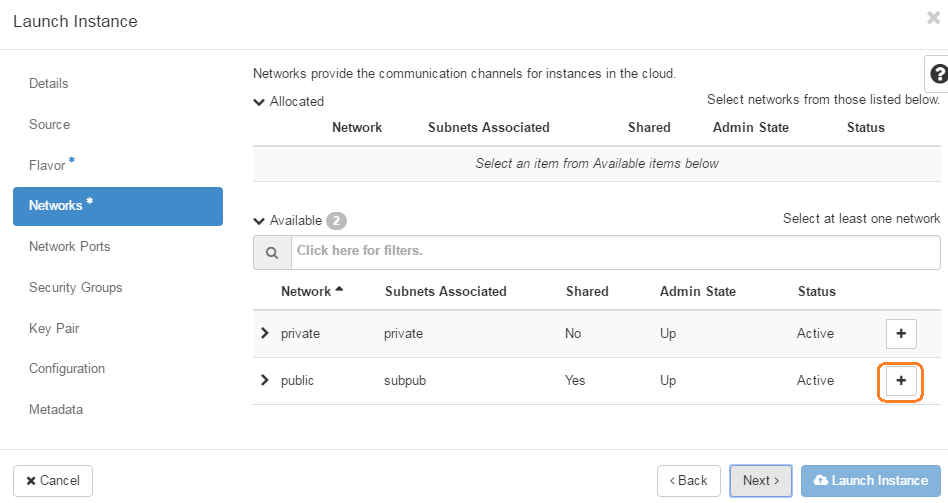
Once you have done this, click on the ‘Security Groups tab’
Select ‘Security Groups’
Check that the the ‘default’ group is selected

You have just configured an instance! Well done. In summary, you have given your instance a name, chosen which source machine image to base the instance on, selected the size of the instance (i.e. amount of memory, disk space and processor power) and configured who can access it. We’re ready to launch it!
Click ‘Launch Instance’

At this point you wait for the instance to come online. This may take a few minutes for a small instance or about 30 minutes for an xxlarge one.
Below you can see an example of an instance starting up (or spawning). It is running in the University data centre. Note that we don’t need to worry or think about the underlying hardware the system is running on. That’s all taken care of for us by OpenStack and the Exeter IT team.

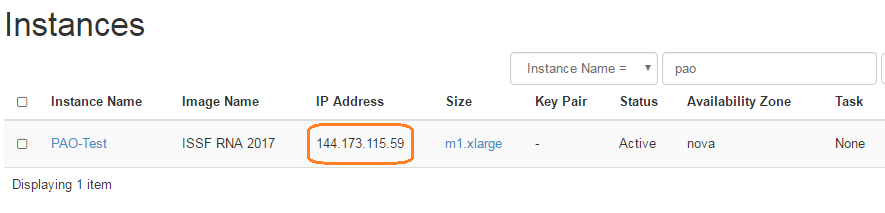
Once it turns white and the ‘Status’ changes to ‘Active’, you should copy the IP address to the clipboard
Copy the IP address address to the clipboard
note: above is an example where the IP address is 144.173.115.209 (yours will be different). We will need it in a moment to connect via X2Go remote desktop. Make sure you copy the whole address and nothing but the address.
Congratulations you have ‘built’ a new computer to use for the rest of your course.
Next, you will learn how to connect to it from your PC.
Connect to your instance.
Command Line Connection
The simplest way you can connect to your instance is using SSH (secure shell). If you are happy using the command line only there are some other software that has additional functionality, and looks better. There are many choices - just Google ‘windows ssh client’
The most commonly used program is PuTTy. https://www.chiark.greenend.org.uk/~sgtatham/putty/latest.html
** The one we recommend is MobaXTerm.**
which gives you a very easy-to-use SSH program for Windows https://mobaxterm.mobatek.net/. It is a commercial product, but there is a free to use version which is perfectly usable. On the training PCs there should be a full version installed.
You can find instructions for both of these programs can be found here.
Graphical connection
For some modules you will need a full graphical desktop connection. This is a bit more complicated to set up, but will give you a full graphical desktop environment to work on. For this we use X2go