Welcome to this Module
This module is intended to provide the reader with a basic overview of essential Unix/Linux commands that will allow them to navigate a file system and move, copy, edit files. It will also introduce a brief overview of some ‘power’ commands in Unix.
Please note to run this module you must first set up the appropriate openstack instance. You will have been provided with the details in a separate document. Use the OpenStack course notes to guide you through it.
The course was orginally developed as part of a Bioinformatics Core Workshop taught at UC Davis (Using the Linux Command-Line for Analysis of High Throughput Sequence Data).
Command-line Bootcamp
Keith Bradnam
UC Davis Genome Center
Version 1.02 — 2015-12-03
 Licensed under a Creative Commons Attribution 4.0 International License.
Please send feedback, questions, money, or abuse to keith@bradnam.co
Introduction
Why Unix / Linux ?
The Unix operating system has been around since 1969. Back then there was no such thing as a graphical user interface. You typed everything. It may seem archaic to use a keyboard to issue commands today, but it’s much easier to automate keyboard tasks than mouse tasks. There are several variants of Unix (including Linux), though the differences do not matter much for most basic functions.
Increasingly, the raw output of biological research exists as in silico data, usually in the form of large text files. Unix is particularly suited to working with such files and has several powerful (and flexible) commands that can process your data for you. The real strength of learning Unix is that most of these commands can be combined in an almost unlimited fashion. So if you can learn just five Unix commands, you will be able to do a lot more than just five things.
Typeset Conventions
Command-line examples that you are meant to type into a terminal window will be shown indented in a constant-width font, e.g.
ls -lrh
Sometimes the accompanying text will include a reference to a Unix command. Any such text will also be in a constant-width, boxed font. E.g.
Type the
pwdcommand again.
From time to time this documentation will contain web links to pages that will help you find out more about certain Unix commands. Usually, the first mention of a command or function will be a hyperlink to Wikipedia. Important or critical points will be styled like so:
This is an important point!
Assumptions
The lessons from this point onwards will assume very little apart from the following:
- You have access to a Unix/Linux system
- You know how to launch a terminal program on that system
- You have a home directory where you can create/edit new files
In the following documentation, we will also assume that the logged in user has a username ‘ubuntu’ and the home directory is located at /home/ubuntu.
Linux Basics (Units 1-5)
Unit 1 - The Terminal
A terminal is the common name for the program that does two main things. It allows you to type input to the computer (i.e. run programs, move/view files etc.) and it allows you to see output from those programs. All Unix machines will have a terminal program available.
Open the terminal application. You should now see something that looks like the following:
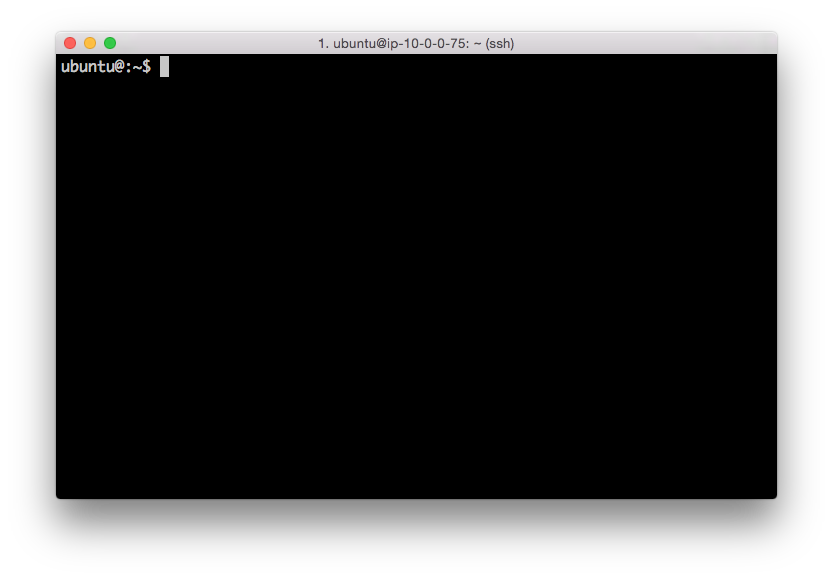
There will be many situations where it will be useful to have multiple terminals open and it will be a matter of preference as to whether you want to have multiple windows, or one window with multiple tabs (there are typically keyboard shortcuts for switching between windows, or moving between tabs).
Unit 2 - Your first Unix command
It’s important to note that you will always be inside a single directory when using the terminal. This is called your working directory. When you open a new terminal you start in your own home directory (containing files and directories that only you can modify). To see what files and directories are in our home directory, we need to use the ls command. This command lists the contents of a directory. If we run the ls command we should see something like:
ubuntu@:~$ ls
command_line_course  linux_bootcamp
ubuntu@:~$
There are four things that you should note here:
- You will probably see different output to what is shown here, it depends on your computer setup. Don’t worry about that for now.
- The
ubuntu@:~$text that you see is the Unix command prompt. In this case, it contains a user name (‘ubuntu’) and the name of the current directory (‘~’, more on that later). Note that the command prompt might not look the same on different Unix systems. In this case, the$sign marks the end of the prompt. - The output of the
lscommand lists two things. In this case, they are both directories, but they could also be files. We’ll learn how to tell them apart later on. These directories were created as part of a specific course that used this bootcamp material. You may see something different on your own computer. - After the
lscommand finishes it produces a new command prompt, ready for you to type your next command.
The ls command is used to list the contents of any directory, not necessarily the one that you are currently in. Try the following:
ubuntu@:~$ ls /home/ubuntu/tutorial_materials/Documentation
Mac keyboard shortcuts.pdf  Unix and Perl.pdf

ubuntu@:~$ ls /etc/perl
CPAN  Net
Unit 3 - The Unix tree
Looking at directories from within a Unix terminal can often seem confusing. But bear in mind that these directories are exactly the same type of folders that you can see if you use any graphical file browser. From the root level (/) there are usually a dozen or so directories. You can treat the root directory like any other, e.g. you can list its contents:
ubuntu@:~$ ls /
bin   etc         lib         media  proc  sbin  sys  var
boot  home        lib64       mnt    root  snap  tmp  vmlinuz
dev   initrd.img  lost+found  opt    run   srv   usr
You might notice some of these names appearing in different colors. Many Unix systems will display files and directories differently by default. Other colors may be used for special types of files. When you log in to a computer you are working with your files in your home directory, and this is often inside a directory called ‘users’ or ‘home’.
Unit 4 - Finding out where you are
There may be many hundreds of directories on any Unix machine, so how do you know which one you are in? The command pwd will Print the Working Directory and that’s pretty much all this command does:
ubuntu@:~$ pwd
/home/ubuntu
When you log in to a Unix computer, you are typically placed into your home directory. In this example, after we log in, we are placed in a directory called ‘ubuntu’ which itself is a subdirectory of another directory called ‘home’. Note that this can be extremely confusing at first. Remember that on a Unix system multiple users might be logged into a system. Every user account has a home directory and they are all stored in /home.
Conversely, ‘ubuntu’ is the parent directory of ‘tutorial_materials’. The first forward slash that appears in a list of directory names always refers to the top level directory of the file system (known as the root directory). The remaining forward slash (between ‘home’ and ‘ubuntu’) delimits the various parts of the directory hierarchy. If you ever get ‘lost’ in Unix, remember the pwd command.
As you learn Unix you will frequently type commands that don’t seem to work. Most of the time this will be because you are in the wrong directory, so it’s a really good habit to get used to running the pwd command a lot.
There is another way to know where you are on most Unix systems. The command prompt usually tells you exactly where you are in the file system. It even tells you the machine you are logged into. Look at the example below:
ubuntu@my-machine:~$ cd tutorial_materials/
ubuntu@my-machine:~/tutorial_materials$ ls
Applications  Code  Data  Documentation
ubuntu@my-machine:~/tutorial_materials$
Here you can see that we are user ubuntu logged into my-machine. Hopefully that is fairly intuitive. The colon is used to separate the machine name from your current location on the machine. The tilde (~) is used as a shorthand to indicate your home directory. In other words (~) is the same as /home/ubuntu.
In the above machine we can see what happens when we change from the ubuntu user home directory (/home/ubuntu) to the directory tutorial_materials. Note that the prompt changes and indicates where we are in the file system (i.e. ~/tutorial_materials is the same as /home/ubuntu/tutorial_materials).
Let’s see what happens to the prompt to if we move to the root directory:
ubuntu@my-machine:~/tutorial_materials$ cd /
ubuntu@my-machine:/$ ls
bin   etc         lib         media  proc  sbin  sys  var
boot  home        lib64       mnt    root  snap  tmp  vmlinuz
dev   initrd.img  lost+found  opt    run   srv   usr
ubuntu@my-machine:/$ cd /home
ubuntu@my-machine:/home$ ls
adminuser  ubuntu
ubuntu@my-machine:/home$
Note that the tilde (~) disappears and is replaced by the full path to the directory we are in. In the example above this is / (the root of the filesystem tree) and then changes to the /home directory as we move into it.
Unit 5 - Making new directories
Let’s change back into the ubuntu user’s home directory (/home/ubuntu)
ubuntu@:/home$: cd /home/ubuntu
If we want to make a new directory (e.g. to store some work related data), we can use the mkdir command:
ubuntu@:~$ ls
Desktop    Downloads  Music     Public     tutorial_materials
Documents  media      Pictures  Templates  Videos
ubuntu@:~$ mkdir Learning_unix
ubuntu@:~$ ls
Desktop    Downloads      media  Pictures  Templates           Videos
Documents  Learning_unix  Music  Public    tutorial_materials
ubuntu@:~$
Linux Basics (Units 6-10)
Unit 6 - Getting from ‘A’ to ‘B’
We are in the home directory on the computer but we want to to work in the new Learning_unix directory. To change directories in Unix, we use the cd command:
cd Learning_unix
ubuntu@:~/Learning_unix$
Notice that on this system the command prompt has expanded to include our current directory. This doesn’t happen by default on all Unix systems, but you should know that you can configure what information appears as part of the command prompt.
Let’s make two new subdirectories and navigate into them:
ubuntu@:~/Learning_unix$ mkdir Outer_directory
ubuntu@:~/Learning_unix$ cd Outer_directory
ubuntu@:~/Learning_unix/Outer_directory$

ubuntu@:~/Learning_unix/Outer_directory$ mkdir Inner_directory
ubuntu@:~/Learning_unix/Outer_directory$ cd Inner_directory/
ubuntu@:~/Learning_unix/Outer_directory/Inner_directory$
Now our command prompt is getting quite long, but it reveals that we are three levels beneath the home directory. We created the two directories in separate steps, but it is possible to use the mkdir command in way to do this all in one step.
Like most Unix commands, mkdir supports command-line options which let you alter its behavior and functionality. Command-like options are, as the name suggests, optional arguments that are placed after the command name. They often take the form of single letters (following a dash). If we had used the -p option of the mkdir command we could have done this in one step. E.g.
mkdir -p Outer_directory/Inner_directory
Note the spaces either side the -p!
Unit 7 - The root directory
Let’s change directory to the root directory, and then into our home directory
ubuntu@:~/Learning_unix/Outer_directory/Inner_directory$ cd /
ubuntu@:/$ cd home
ubuntu@:/home$ cd ubuntu
ubuntu@:~$
In this case, we may as well have just changed directory in one go:
cd /home/ubuntu/
The leading / is incredibly important. The following two commands are very different:
cd /home/ubuntu/
cd home/ubuntu/
The first command says go the ubuntu directory that is beneath the home directory that is at the top level (the root) of the file system. There can only be one /home/ubuntu directory on any Unix system.
The second command says go to the ubuntu directory that is beneath the home directory that is located wherever I am right now. There can potentially be many home/ubuntu directories on a Unix system (though this is unlikely).
Learn and understand the difference between these two commands.
Unit 8 - Navigating upwards in the Unix filesystem
Frequently, you will find that you want to go ‘upwards’ one level in the directory hierarchy. Two dots .. are used in Unix to refer to the parent directory of wherever you are. Every directory has a parent except the root level of the computer. Let’s go into the Learning_unix directory and then navigate up two levels:
ubuntu@:~$ cd Learning_unix/
ubuntu@:~/Learning_unix$ cd ..
ubuntu@:~$ cd ..
ubuntu@:/home$
What if you wanted to navigate up two levels in the file system in one go? It’s very simple, just use two sets of the .. operator, separated by a forward slash:
cd ../..
Unit 9 - Absolute and relative paths
Using cd .. allows us to change directory relative to where we are now. You can also always change to a directory based on its absolute location. E.g. if you are working in the /home/ubuntu/Learning_unix directory and you then want to change to the /tmp directory, then you could do either of the following:
$ cd ../../../tmp
or…
$ cd /tmp
They both achieve the same thing, but the 2nd example requires that you know about the full path from the root level of the computer to your directory of interest (the ‘path’ is an important concept in Unix). Sometimes it is quicker to change directories using the relative path, and other times it will be quicker to use the absolute path.
Unit 10 - Finding your way back home
Remember that the command prompt shows you the name of the directory that you are currently in, and that when you are in your home directory it shows you a tilde character (~) instead? This is because Unix uses the tilde character as a short-hand way of specifying a home directory.
See what happens when you try the following commands (use the pwd command after each one to confirm the results if necessary):
cd /
cd ~
cd
Hopefully, you should find that cd and cd ~ do the same thing, i.e. they take you back to your home directory (from wherever you were). You will frequently want to jump straight back to your home directory, and typing cd is a very quick way to get there.
You can also use the ~ as a quick way of navigating into subdirectories of your home directory when your current directory is somewhere else. I.e. the quickest way of navigating from the root directory to your Learning_unix directory is as follows:
ubuntu@:~$ cd /
ubuntu@:/$ cd ~/Learning_unix
Linux Basics (Units 11-15)
Unit 11 - Making the ls command more useful
The .. operator that we saw earlier can also be used with the ls command, e.g. you can list directories that are ‘above’ you:
ubuntu@:~/Learning_unix$ cd ~/Learning_unix/Outer_directory/
ubuntu@:~/Learning_unix/Outer_directory$ ls ../../
command_line_course  Learning_unix  linux_bootcamp
Time to learn another useful command-line option. If you add the letter ‘l’ to the ls command it will give you a longer output compared to the default:
ubuntu@:~$ ls -l /home
total 8
drwxr-xr-x  2 adminuser adminuser 4096 Nov  2 18:19 adminuser
drwxr-xr-x 20 ubuntu    ubuntu    4096 Nov  3 21:27 ubuntu
For each file or directory we now see more information (including file ownership and modification times). The ‘d’ at the start of each line indicates that these are directories. There are many, many different options for the ls command. Try out the following (against any directory of your choice) to see how the output changes.
ls -l
ls -R
ls -l -t -r
ls -lh
Note that the last example combine multiple options but only use one dash. This is a very common way of specifying multiple command-line options. You may be wondering what some of these options are doing. It’s time to learn about Unix documentation….
Unit 12 - Man pages
If every Unix command has so many options, you might be wondering how you find out what they are and what they do. Well, thankfully every Unix command has an associated ‘manual’ that you can access by using the man command. E.g.
man ls
man cd
man man # yes even the man command has a manual page
When you are using the man command, press space to scroll down a page, b to go back a page, or q to quit. You can also use the up and down arrows to scroll a line at a time. The man command is actually using another Unix program, a text viewer called less, which we’ll come to later on.
Unit 13 - Removing directories
We now have a few (empty) directories that we should remove. To do this use the rmdir command, this will only remove empty directories so it is quite safe to use. If you want to know more about this command (or any Unix command), then remember that you can just look at its man page.
ubuntu@:~$ cd ~/Learning_unix/Outer_directory/
ubuntu@:~/Learning_unix/Outer_directory$ rmdir Inner_directory/
ubuntu@:~/Learning_unix/Outer_directory$ cd ..
ubuntu@:~/Learning_unix$ rmdir Outer_directory/
ubuntu@:~/Learning_unix$ ls
ubuntu@:~/Learning_unix$
** Note, you have to be outside a directory before you can remove it with rmdir **
Unit 14 - Using tab completion
Saving keystrokes may not seem important, but the longer that you spend typing in a terminal window, the happier you will be if you can reduce the time you spend at the keyboard. Especially, as prolonged typing is not good for your body. So the best Unix tip to learn early on is that you can tab complete the names of files and programs on most Unix systems. Type enough letters that uniquely identify the name of a file, directory or program and press tab…Unix will do the rest. E.g. if you type ‘tou’ and then press tab, Unix should autocomplete the word to ‘touch’ (this is a command which we will learn more about in a minute). In this case, tab completion will occur because there are no other Unix commands that start with ‘tou’. If pressing tab doesn’t do anything, then you have not have typed enough unique characters. In this case pressing tab twice will show you all possible completions. This trick can save you a LOT of typing!
Navigate to your home directory, and then use the cd command to change to the Learning_unix directory. Use tab completion to complete directory name. If there are no other directories starting with ‘L’ in your home directory, then you should only need to type ‘cd’ + ‘L’ + ‘tab’.
Tab completion will make your life easier and make you more productive! If you are typing too much - you are doing it wrong!
Another great time-saver is that Unix stores a list of all the commands that you have typed in each login session. You can access this list by using the history command or more simply by using the up and down arrows to access anything from your history. So if you type a long command but make a mistake, press the up arrow and then you can use the left and right arrows to move the cursor in order to make a change.
The history command is very useful to dump all the commands you have used to perform an analysis.
Unit 15 - Creating empty files with the touch command
The following sections will deal with Unix commands that help us to work with files, i.e. copy files to/from places, move files, rename files, remove files, and most importantly, look at files. First, we need to have some files to play with. The Unix command touch will let us create a new, empty file. The touch command does other things too, but for now we just want a couple of files to work with.
ubuntu@:~$ cd Learning_unix/
ubuntu@:~/Learning_unix$ touch heaven.txt
ubuntu@:~/Learning_unix$ touch earth.txt
ubuntu@:~/Learning_unix$ ls
earth.txt  heaven.txt
Linux Basics (Units 16-20)
Unit 16 - Moving files
Now, let’s assume that we want to move these files to a new directory (‘Temp’). We will do this using the Unix mv (move) command. Remember to use tab completion:
ubuntu@:~/Learning_unix$ mkdir Temp
ubuntu@:~/Learning_unix$ mv heaven.txt Temp/
ubuntu@:~/Learning_unix$ mv earth.txt Temp/
ubuntu@:~/Learning_unix$ ls
Temp
ubuntu@:~/Learning_unix$ ls Temp/
earth.txt  heaven.txt
For the mv command, we always have to specify a source file (or directory) that we want to move, and then specify a target location. If we had wanted to we could have moved both files in one go by typing any of the following commands:
mv *.txt Temp/
mv *t Temp/
mv *ea* Temp/
The asterisk * acts as a wild-card character, essentially meaning ‘match anything’. The second example works because there are no other files or directories in the directory that end with the letters ‘t’ (if there was, then they would be moved too). Likewise, the third example works because only those two files contain the letters ‘ea’ in their names. Using wild-card characters can save you a lot of typing.
The ‘?’ character is also a wild-card but with a slightly different meaning. See if you can work out what it does.
Unit 17 - Renaming files
In the earlier example, the destination for the mv command was a directory name (Temp). So we moved a file from its source location to a target location, but note that the target could have also been a (different) file name, rather than a directory. E.g. let’s make a new file and move it whilst renaming it at the same time:
ubuntu@:~/Learning_unix$ touch rags
ubuntu@:~/Learning_unix$ ls
rags  Temp
ubuntu@:~/Learning_unix$ mv rags Temp/riches
ubuntu@:~/Learning_unix$ ls Temp/
earth.txt  heaven.txt  riches
In this example we create a new file (‘rags’) and move it to a new location and in the process change the name (to ‘riches’). So mv can rename a file as well as move it. The logical extension of this is using mv to rename a file without moving it (you have to use mv to do this as Unix does not have a separate ‘rename’ command):
ubuntu@:~/Learning_unix$ mv Temp/riches Temp/rags
Unit 18 - Moving directories
It is important to understand that as long as you have specified a ‘source’ and a ‘target’ location when you are moving a file, then it doesn’t matter what your current directory is. You can move or copy things within the same directory or between different directories regardless of whether you are in any of those directories. Moving directories is just like moving files:
ubuntu@:~/Learning_unix$ mv Temp/riches Temp/rags
ubuntu@:~/Learning_unix$ mkdir Temp2
ubuntu@:~/Learning_unix$ mv Temp2 Temp
ubuntu@:~/Learning_unix$ ls Temp/
earth.txt  heaven.txt  rags  Temp2
This step moves the Temp2 directory inside the Temp directory. Try creating a ‘Temp3’ directory inside ‘Learning_unix’ and then cd to /tmp. Can you move Temp3 inside Temp without changing directory?
Unit 19 - Removing files
You’ve seen how to remove a directory with the rmdir command, but rmdir won’t remove directories if they contain any files. So how can we remove the files we have created (inside Learning_Unix/Temp)? In order to do this, we will have to use the rm (remove) command.
Please read the next section VERY carefully. Misuse of the
rmcommand can lead to needless death & destruction
Potentially, rm is a very dangerous command; if you delete something with rm, you will not get it back! It is possible to delete everything in your home directory (all directories and subdirectories) with rm, that is why it is such a dangerous command.
Let me repeat that last part again. It is possible to delete EVERY file you have ever created with the rm command. Are you scared yet? You should be. Luckily there is a way of making rm a little bit safer. We can use it with the -i command-line option which will ask for confirmation before deleting anything (remember to use tab-completion):
ubuntu@:~/Learning_unix$ cd Temp
ubuntu@:~/Learning_unix/Temp$ ls
earth.txt  heaven.txt  rags  Temp2
ubuntu@:~/Learning_unix/Temp$ rm -i earth.txt heaven.txt rags
rm: remove regular empty file 'earth.txt' y
rm: remove regular empty file 'heaven.txt' y
rm: remove regular empty file 'rags' y
ubuntu@:~/Learning_unix/Temp$ ls
Temp2
We could have simplified this step by using a wild-card (e.g. rm -i *.txt) or we could have made things more complex by removing each file with a separate rm command. Let’s finish cleaning up:
rmdir Temp2/Temp3
rmdir Temp2
cd ..
rmdir Temp
Unit 20 - Copying files
Copying files with the cp (copy) command is very similar to moving them. Remember to always specify a source and a target location. Let’s create a new file and make a copy of it:
ubuntu@:~/Learning_unix$ touch file1
ubuntu@:~/Learning_unix$ cp file1 file2
ubuntu@:~/Learning_unix$ ls
file1  file2
What if we wanted to copy files from a different directory to our current directory? Let’s put a file in our home directory (specified by ~ remember) and copy it to the current directory (Learning_unix):
ubuntu@:~/Learning_unix$ touch ~/file3
ubuntu@:~/Learning_unix$ ls ~
Desktop    Downloads      media  Pictures  Templates           Videos
Documents  Learning_unix  Music  Public    tutorial_materials
ubuntu@:~/Learning_unix$ cp ~/file3 .
ubuntu@:~/Learning_unix$ ls
file1  file2  file3
This last step introduces another new concept. In Unix, the current directory can be represented by a . (dot) character. You will mostly use this only for copying files to the current directory that you are in. Compare the following:
ls
ls .
ls ./
In this case, using the dot is somewhat pointless because ls will already list the contents of the current directory by default. Also note how the trailing slash is optional. You can use rm to remove the temporary files.
Linux Basics (Units 21-25)
Unit 21 - Copying directories
The cp command also allows us (with the use of a command-line option) to copy entire directories. Use man cp to see how the -R or -r options let you copy a directory recursively.
Unit 22 - Viewing files with less
So far we have covered listing the contents of directories and moving/copying/deleting either files and/or directories. Now we will quickly cover how you can look at files. The less command lets you view (but not edit) text files. We will use the echo command to put some text in a file and then view it:
ubuntu@:~/Learning_unix$ echo "Call me Ishmael."
Call me Ishmael.
ubuntu@:~/Learning_unix$ echo "Call me Ishmael." > opening_lines.txt
ubuntu@:~/Learning_unix$ ls
opening_lines.txt
ubuntu@:~/Learning_unix$ less opening_lines.txt
On its own, echo isn’t a very exciting Unix command. It just echoes text back to the screen. But we can redirect that text into an output file by using the > symbol. This allows for something called file redirection.
Careful when using file redirection (>), it will overwrite any existing file of the same name
When you are using less, you can bring up a page of help commands by pressing h, scroll forward a page by pressing space, or go forward or backwards one line at a time by pressing j or k. To exit less, press q (for quit). The less program also does about a million other useful things (including text searching).
Unit 23 - Viewing files with cat
Let’s add another line to the file:
ubuntu@:~/Learning_unix$ echo "The primroses were over." >> opening_lines.txt
ubuntu@:~/Learning_unix$ cat opening_lines.txt
Call me Ishmael.
The primroses were over.
Notice that we use >> and not just >. This operator will append to a file. If we only used >, we would end up overwriting the file. The cat command displays the contents of the file (or files) and then returns you to the command line. Unlike less you have no control on how you view that text (or what you do with it). It is a very simple, but sometimes useful, command. You can use cat to quickly combine multiple files or, if you wanted to, make a copy of an existing file:
cat opening_lines.txt > file_copy.txt
Unit 24 - Counting characters in a file
ubuntu@:~/Learning_unix$ ls
opening_lines.txt

ubuntu@:~/Learning_unix$ ls -l
total 4
-rw-rw-r-- 1 ubuntu ubuntu 42 Jun 15 04:13 opening_lines.txt

ubuntu@:~/Learning_unix$ wc opening_lines.txt
 2  7 42 opening_lines.txt

ubuntu@:~/Learning_unix$ wc -l opening_lines.txt
2 opening_lines.txt
The ls -l option shows us a long listing, which includes the size of the file in bytes (in this case ‘42’). Another way of finding this out is by using Unix’s wc command (word count). By default this tells you many lines, words, and characters are in a specified file (or files), but you can use command-line options to give you just one of those statistics (in this case we count lines with wc -l).
Unit 25 - Editing small text files with nano
Nano is a lightweight editor installed on most Unix systems. There are many more powerful editors (such as ‘emacs’ and ‘vi’), but these have steep learning curves. Nano is very simple. You can edit (or create) files by typing:
nano opening_lines.txt
You should see the following appear in your terminal:
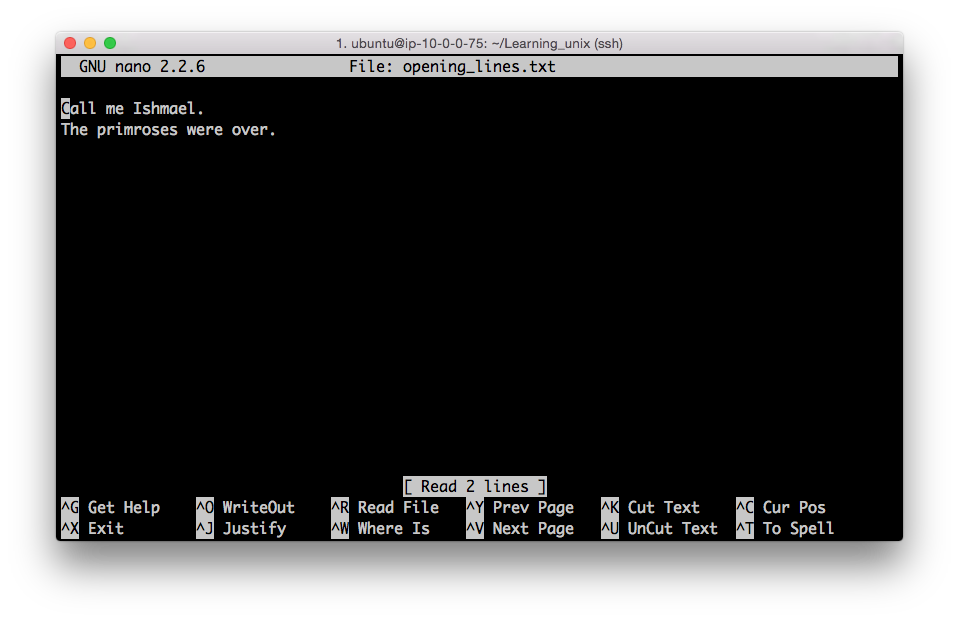
The bottom of the nano window shows you a list of simple commands which are all accessible by typing ‘Control’ plus a letter. E.g. Control + X exits the program.
Linux Basics (Units 26-28)
Unit 26 - The $PATH environment variable
One other use of the echo command is for displaying the contents of something known as environment variables. These contain user-specific or system-wide values that either reflect simple pieces of information (your username), or lists of useful locations on the file system. Some examples:
ubuntu@:~/Learning_unix$ echo $USER
ubuntu
ubuntu@:~/Learning_unix$ echo $HOME
/home/ubuntu
ubuntu@:~/Learning_unix$ echo $PATH
/usr/local/sbin:/usr/local/bin:/usr/sbin:/usr/bin:/sbin:/bin:/usr/games:/usr/local/games
The last one shows the content of the $PATH environment variable, which displays a ‘colon separated’ list of directories that are expected to contain programs that you can run. This includes all of the Unix commands that you have seen so far. These are files that live in directories which are run like programs (e.g. ls is just a special type of file in the /bin directory).
Knowing how to change your $PATH to include custom directories can be necessary sometimes (e.g. if you install some new bioinformatics software in a non-standard location).
Unit 27 - Matching lines in files with grep
Use nano to add the following lines to opening_lines.txt:
Now is the winter of our discontent.
All children, except one, grow up.
The Galactic Empire was dying.
In a hole in the ground there lived a hobbit.
It was a pleasure to burn.
It was a bright, cold day in April, and the clocks were striking thirteen.
It was love at first sight.
I am an invisible man.
It was the day my grandmother exploded.
When he was nearly thirteen, my brother Jem got his arm badly broken at the elbow.
Marley was dead, to begin with.
You will often want to search files to find lines that match a certain pattern. The Unix command grep does this (and much more). The following examples show how you can use grep’s command-line options to:
- show lines that match a specified pattern
- ignore case when matching (
-i) - only match whole words (
-w) - show lines that don’t match a pattern (
-v) - Use wildcard characters and other patterns to allow for alternatives (
*,., and[])
grep was opening_lines.txt
The Galactic Empire was dying.
It was a pleasure to burn.
It was a bright, cold day in April, and the clocks were striking thirteen.
It was love at first sight.
It was the day my grandmother exploded.
When he was nearly thirteen, my brother Jem got his arm badly broken at the elbow.
Marley was dead, to begin with.

grep -v was opening_lines.txt
Call me Ishmael.
The primroses were over.
Now is the winter of our discontent.
All children, except one, grow up.
In a hole in the ground there lived a hobbit.
I am an invisible man.

grep all opening_lines.txt
Call me Ishmael.

grep -i all opening_lines.txt
Call me Ishmael.
All children, except one, grow up.

grep in opening_lines.txt
Now is the winter of our discontent.
The Galactic Empire was dying.
In a hole in the ground there lived a hobbit.
It was a bright, cold day in April, and the clocks were striking thirteen.
I am an invisible man.
Marley was dead, to begin with.

grep -w in opening_lines.txt
In a hole in the ground there lived a hobbit.
It was a bright, cold day in April, and the clocks were striking thirteen.

grep -w o.. opening_lines.txt
Now is the winter of our discontent.
All children, except one, grow up.

grep [aeiou]t opening_lines.txt
In a hole in the ground there lived a hobbit.
It was love at first sight.
It was the day my grandmother exploded.
When he was nearly thirteen, my brother Jem got his arm badly broken at the elbow.
Marley was dead, to begin with.

grep -w -i [aeiou]t opening_lines.txt
It was a pleasure to burn.
It was a bright, cold day in April, and the clocks were striking thirteen.
It was love at first sight.
It was the day my grandmother exploded.
When he was nearly thirteen, my brother Jem got his arm badly broken at the elbow.
Unit 28 - Combining Unix commands with pipes
One of the most powerful features of Unix is that you can send the output from one command or program to any other command (as long as the second command accepts input of some sort). We do this by using what is known as a pipe. This is implemented using the ‘|’ character (which is a character which always seems to be on different keys depending on the keyboard that you are using). Think of the pipe as simply connecting two Unix programs. Here’s an example which introduces some new Unix commands:
ubuntu@:~/Learning_unix$ grep was opening_lines.txt | wc -c
316

ubuntu@:~/Learning_unix$
grep was opening_lines.txt | sort | head -n 3 | wc -c
130
The first use of grep searches the specified file for lines matching ‘was’, it sends the lines that match through a pipe to the wc program. We use the -c option to just count characters in the matching lines (316).
The second example first sends the output of grep to the Unix sort command. This sorts a file alphanumerically by default. The sorted output is sent to the head command which by default shows the first 10 lines of a file. We use the -n option of this command to only show 3 lines. These 3 lines are then sent to the wc command as before.
Whenever making a long pipe, test each step as you build it!
Unit 29 - Miscellaneous Unix power commands
The following examples introduce some other Unix commands, and show how they could be used to work on a fictional file called file.txt. Remember, you can always learn more about these Unix commands from their respective man pages with the man command. These are not all real world cases, but rather show the diversity of Unix command-line tools:
tail -n 20 file.txt | head
- Show lines of a file that begin with a start codon (ATG) (the
^matches patterns at the start of a line):
grep "^ATG" file.txt
- Cut out the 3rd column of a tab-delimited text file and sort it to only show unique lines (i.e. remove duplicates):
cut -f 3 file.txt | sort -u
- Count how many lines in a file contain the words ‘cat’ or ‘bat’ (
-coption ofgrepcounts lines):
grep -c '[bc]at' file.txt
- Turn lower-case text into upper-case (using tr command to ‘transliterate’):
cat file.txt | tr 'a-z' 'A-Z'
- Change all occurences of ‘Chr1’ to ‘Chromosome 1’ and write changed output to a new file (using sed command):
cat file.txt | sed 's/Chr1/Chromosome 1/' > file2.txt
Linux Advanced (Units 33-35)
Unit 33 - Match making
You will often want to search files to find lines that match a certain pattern. The Unix command grep does this (and much more). You might already know that FASTA files (used frequently in bioinformatics) have a simple format: one header line which must start with a ‘>’ character, followed by a DNA or protein sequence on subsequent lines. To find only those header lines in a FASTA file, we can use grep, which just requires you specify a pattern to search for, and one or more files to search:
$ cd ~/tutorial_materials/Data/Arabidopsis/
$ grep ">" intron_IME_data.fasta

>AT1G68260.1_i1_204_CDS
>AT1G68260.1_i2_457_CDS
>AT1G68260.1_i3_1286_CDS
>AT1G68260.1_i4_1464_CDS
.
.
.
This will produce lots of output which will flood past your screen. If you ever want to stop a program running in Unix, you can type Control+C (this sends an interrupt signal which should stop most Unix programs). The grep command has many different command-line options (type man grep to see them all), and one common option is to get grep to show lines that don’t match your input pattern. You can do this with the -v option and in this example we are seeing just the sequence part of the FASTA file.
$ grep -v ">" intron_IME_data.fasta

GTATACACATCTCTCTACTTTCATATTTTGCATCTCTAACGAAATCGGATTCCGTCGTTG
TGAAATTGAGTTTTCGGATTCAGTGTTGTCGAGATTCTATATCTGATTCAGTGATCTAAT
GATTCTGATTGAAAATCTTCGCTATTGTACAG
GTTAGTTTTCAATGTTGCTGCTTCTGATTGTTGAAAGTGTTCATACATTTGTGAATTTAG
TTGATAAAATCTGAACTCTGCATGATCAAAGTTACTTCTTTACTTAGTTTGACAGGGACT
TTTTTTGTGAATGTGGTTGAGTAGAATTTAGGGCTTTGGATTAAATGTGACAAGATTTTG
.
.
.
Unit 34 - Your first ever Unix pipe
By now, you might be getting a bit fed up of waiting for the grep command to finish, or you might want a cleaner way of controlling things without having to reach for Ctrl-C. Ideally, you might want to look at the output from any command in a controlled manner, i.e. you might want to use a Unix program like less to view the output.
This is very easy to do in Unix, you can send the output from any command to any other Unix program (as long as the second program accepts input of some sort). We do this by using what is known as a pipe. This is implemented using the ‘|’ character (which is a character which always seems to be on different keys depending on the keyboard that you are using). Think of the pipe as simply connecting two Unix programs. In this next example we send the output from grep down a pipe to the less program. Let’s imagine that we just want to see lines in the input file which contain the pattern “ATGTGA” (a potential start and stop codon combined):
$ grep "ATGTGA" intron_IME_data.fasta | less

TTTTTGTGAATGTGGTTGAGTAGAATTTAGGGCTTTGGATTAAATGTGACAAGATTTTG
CTGAATGTGACTGGAAGAATGAAATGTGTTAAGATCTTGTTCGTTAAGTTTAGAGTCTTG
GGTGGAATGAATTTATGTATCATGTGATAGCTGTTGCATTACAAGATGTAATTTTGCAAA
GTCTATGTGATGGCCATAGCCCATAGTGACTGATAGCTCCTTACTTTGTTTTTTTTTTCT
TTACTTGCAAAATTCCATGTGATTTTTTATATTACTTTGAAGAATTTTATAATATATTTT
TTGCATCAAGATATGTGACATCTTCAAAAAGATAACTTGTGAGAAGACAATTATAATATG
GTAACTTATTTATTGATTGAATCAGTAACTGTATTGTTATCATGATTTGTGAATATGTGA
AATCTTTGTGGTGGGTCTACGATATGAGCTGTCAATATATTTTTGTTTATACATGTGATC
GTATGTGAGCAAACGATGTCTCGTTTTCTCTCTCTCAATGATCAAGCACCTAACTTAAAT\
.
.
.
Notice that you still have control of your output as you are now in the less program. If you press the forward slash (/) key in less, you can then specify a search pattern. Type ATGTGA after the slash and press enter. The less program will highlight the location of these matches on each line. Note that grep matches patterns on a per line basis. So if one line ended ATG and the next line started TGA, then grep would not find it.
Any time you run a Unix program or command that outputs a lot of text to the screen, you can instead pipe that output into the
lessprogram.
Unit 35 - Heads and tails
Sometimes we do not want to use less to see all of the output from a command like grep. We might just want to see a few lines to get a feeling for what the output looks like, or just check that our program (or Unix command) is working properly. There are two useful Unix commands for doing this: head and tail. These commands show (by default) the first or last 10 lines of a file (though it is easy to specify more or fewer lines of output). So now, let’s look for another pattern which might be in all the sequence files in the directory. If we didn’t know whether the DNA/protein sequence in a FASTA files was in upper-case or lower-case letters, then we could use the -i option of grep which ‘ignores’ case when searching:
$ grep -i ACGTC * | head
At_proteins.fasta:TYRSPRCNSAVCSRAGSIACGTCFSPPRPGCSNNTCGAFPDNSITGWATSGEFALDVVSIQSTNGSNPGRFVKIPNLIFS
At_proteins.fasta:FRRYGHYISSDVFRRFKGSNGNFKESLTGYAKGMLSLYEAAHLGTTKDYILQEALSFTSSHLESLAACGTCPPHLSVHIQ
At_proteins.fasta:MAISKALIASLLISLLVLQLVQADVENSQKKNGYAKKIDCGSACVARCRLSRRPRLCHRACGTCCYRCNCVPPGTYGNYD
At_proteins.fasta:MAVFRVLLASLLISLLVLDFVHADMVTSNDAPKIDCNSRCQERCSLSSRPNLCHRACGTCCARCNCVAPGTSGNYDKCPC
chr1.fasta:TGTCTACTGATTTGATGTTTTCCTAAACTGTTGATTCGTTTCAGGTCAACCAATCACGTCAACGAAATTCAGGATCTTA
chr1.fasta:TATGCTGCAAGTACCAGTCAATTTTAGTATGGGAAACTATAAACATGTATAATCAACCAATGAACACGTCAATAACCTA
chr1.fasta:TTGAACAGCTTAGGGTGAAAATTATGATCCGTAGAGACAGCATTTAAAAGTTCCTTACGTCCACGTAAAATAATATATC
chr1.fasta:GGGATCACGAGTCTGTTGAGTTTTCCGACGTCGCTTGGTGTTACCACTTTGTCGAACATGTGTTCTTTCTCCGGAGGTG
chr1.fasta:CTGCAAAGGCCTACCTGTTTGTCCCTGTTACTGACAATACGTCTATGGAACCCATAAAAGGGATCAACTGGGAATTGGT
chr1.fasta:ACGTCGAAGGGGGTAAGATTGCAGCTAATCATTTGATGAAATGGATTGGGATTCACGTGGAGGATGATCCTGATGAAGT
The * character acts as a wildcard meaning ‘search all files in the current directory’ and the head command restricts the total amount of output to 10 lines. Notice that the output also includes the name of the file containing the matching pattern. In this case, the grep command finds the ACGTC pattern in four protein sequences and several lines of the the chromosome 1 DNA sequence (we don’t know how many exactly because the head command is only giving us ten lines of output).
Linux Advanced (Units 36-40)
Unit 36 - Getting fancy with regular expressions
A concept that is supported by many Unix programs and also by most programming languages is that of using regular expressions. These allow you to specify search patterns which are quite complex and really help restrict the huge amount of data that you might be searching for to some very specific lines of output. E.g. you might want to find lines that start with an ‘ATG’ and finish with ‘TGA’ but which have at least three AC dinucleotides in the middle:
$ grep "^ATG.*ACACAC.*TGA$" chr1.fasta

ATGAACCTTGTACTTCACCGGGTGCCCTCAAAGACGTTCTGCTCGGAAGGTTTGTCTTACACACTTTGATGTCAAATGA
ATGATAGCTCAACCACGAAATGTCATTACCTGAAACCCTTAAACACACTCTACCTCAAACTTACTGGTAAAAACATTGA
ATGCATACCTCAGTTGCATCCCGGCGCAGGGCAAGCATACCCGCTTCAACACACACTGCTTTGAGTTGAGCTCCATTGA
You’ll learn more about regular expressions when you start programming. The ^ character is a special character that tells grep to only match a pattern if it occurs at the start of a line. Similarly, the $ tells grep to match patterns that occur at the end of the line.
Task
The . and * characters are also special characters that form part of the regular expression. Try to understand how the following patterns all differ. Try using each of these these patterns with grep against any one of the sequence files. Can you predict which of the five patterns will generate the most matches?
ACGT
AC.GT
AC*GT
AC.*GT
The asterisk in a regular expression is similar to, but NOT the same, as the other asterisks that we have seen so far. An asterisk in a regular expression means: ‘match zero or more of the preceding character or pattern’.
Try searching for the following patterns to ensure you understand what . and * are doing:
A...T
AG*T
A*C*G*T*
Unit 37 - Counting with grep
Rather than showing you the lines that match a certain pattern, grep can also just give you a count of how many lines match. This is one of the frequently used grep options. Running grep -c simply counts how many lines match the specified pattern. It doesn’t show you the lines themselves, just a number:
$ grep -c i2 intron_IME_data.fasta
9785
Task
Count how many times each pattern from Task in Unit 36 occurs in all of the sequence files (specifying *.fasta will allow you to specify all sequence files).
Unit 38 - Regular expressions in less
You have seen already how you can use less to view files, and also to search for patterns. If you are viewing a file with less, you can type a forward-slash / character, and this allows you to then specify a pattern and it will then search for (and highlight) all matches to that pattern. Technically it is searching forward from whatever point you are at in the file. You can also type a question-mark ? and less will allow you to search backwards. The real bonus is that the patterns you specify can be regular expressions.
Task
Try viewing a sequence file with less and then searching for a pattern such as ATCG.*TAG$. This should make it easier to see exactly where your regular expression pattern matches. After typing a forward-slash (or a question-mark), you can press the up and down arrows to select previous searches.
Unit 39 - Let me transl(iter)ate that for you
We have seen that these sequence files contain upper-case characters. What if we wanted to turn them into lower-case characters (because maybe another bioinformatics program will only work if they are lower-case)? The Unix command tr (short for transliterate) does just this, it takes one range of characters that you specify and changes them into another range of characters:
$ head -n 2 chr1.fasta

>Chr1 dumped from ADB: Mar/14/08 12:28; last updated: 2007-12-20
CCCTAAACCCTAAACCCTAAACCCTAAACCTCTGAATCCTTAATCCCTAAATCCCTAAATCTTTAAATCCTACATCCAT

$ head -n 2 chr1.fasta | tr 'A-Z' 'a-z'

>chr1 dumped from adb: mar/14/08 12:28; last updated: 2007-12-20
ccctaaaccctaaaccctaaaccctaaacctctgaatccttaatccctaaatccctaaatctttaaatcctacatccat
Unit 40 - That’s what she sed
The tr command let’s you change a range of characters into another range. But what if you wanted to change a particular pattern into something completely different? Unix has a very powerful command called sed that is capable of performing a variety of text manipulations. Let’s assume that you want to change the way the FASTA header looks:
$ head -n 1 chr1.fasta >Chr1 dumped from ADB: Mar/14/08 12:28; last updated: 2007-12-20

$ head -n 1 chr1.fasta | sed 's/Chr1/Chromosome 1/' >Chromosome 1 dumped from ADB: Mar/14/08 12:28; last updated: 2007-12-20
The ‘s’ part of the sed command puts sed in ‘substitute’ mode, where you specify one pattern (between the first two forward slashes) to be replaced by another pattern (specified between the second set of forward slashes). Note that this doesn’t actually change the contents of the file, it just changes the screen output from the previous command in the pipe. We will learn later on how to send the output from a command into a new file.
Linux Advanced (Units 41-45)
Unit 41 - Word up
For this section we want to work with a different type of file. It is sometimes good to get a feeling for how large a file is before you start running lots of commands against it. The ls -l command will tell you how big a file is, but for many purposes it is often more desirable to know how many ‘lines’ it has. That is because many Unix commands like grep and sed work on a line by line basis. Fortunately, there is a simple Unix command called wc (word count) that does this:
$ cd ~/tutorial_materials/Data/Arabidopsis/ $ wc At_genes.gff 531497 4783473 39322356 At_genes.gff
The three numbers in the output above count the number of lines, words and bytes in the specified file(s). If we had run wc -l, the -l option would have shown us just the line count.
Unit 42 - GFF and the art of redirection
The Arabidopsis directory also contains a GFF file. This is a common file format in bioinformatics and GFF files are used to describe the location of various features on a DNA sequence. Features can be exons, genes, binding sites etc, and the sequence can be a single gene or (more commonly) an entire chromosome.
This GFF file describes of all of the gene-related features from chromosome I of A. thaliana. We want to play around with some of this data, but don’t need all of the file…just 10,000 lines will do (rather than the ~500,000 lines in the original). We will create a new (smaller) file that contains a subset of the original:
$ head -n 10000 At_genes.gff > At_genes_subset.gff
$ ls -l
total 195360
-rwxrwxrwx  1 keith  staff  39322356 Jul  9 15:02 At_genes.gff
-rwxrwxrwx  1 keith  staff    705370 Jul 10 13:33 At_genes_subset.gff
-rwxrwxrwx  1 keith  staf f 17836225 Oct  9  2008 At_proteins.fasta
-rwxrwxrwx  1 keith  staff  30817851 May  7  2008 chr1.fasta
-rwxrwxrwx  1 keith  staff  11330285 Jul 10 11:11 intron_IME_data.fasta
This step introduces a new concept. Up till now we have sent the output of any command to the screen (this is the default behavior of Unix commands), or through a pipe to another program. Sometimes you just want to redirect the output into an actual file, and that is what the > symbol is doing, it acts as one of three redirection operators in Unix.
As already mentioned, the GFF file that we are working with is a standard file format in bioinformatics. For now, all you really need to know is that every GFF file has 9 fields, each separated with a tab character. There should always be some text at every position (even if it is just a ‘.’ character). The last field often is used to store a lot of text.
Unit 43 - Not just a pipe dream
The 2nd and/or 3rd fields of a GFF file are usually used to describe some sort of biological feature. We might be interested in seeing how many different features are in our file:
$ cut -f 3 At_genes_subset.gff | sort | uniq

CDS
chromosome
exon
five_prime_UTR
gene
mRNA
miRNA
ncRNA
protein
pseudogene
pseudogenic_exon
pseudogenic_transcript
snoRNA
tRNA
three_prime_UTR
transposable_element_gene
In this example, we combine three separate Unix commands together in one go. Let’s break it down (it can be useful to just run each command one at at time to see how each additional command is modifying the preceding output):
- The cut command first takes the At_genes_subset.gff file and ‘cuts’ out just the 3rd column (as specified by the
-foption). Luckily, the default behavior for thecutcommand is to split text files into columns based on tab characters (if the columns were separated by another character such as a comma then we would need to use another command line option to specify the comma). - The sort command takes the output of the cut command and sorts it alphanumerically.
- The uniq command (in its default format) only keeps lines which are unique to the output (otherwise you would see thousands of fields which said ‘curated’, ‘Coding_transcript’ etc.)
Now let’s imagine that you might want to find which features start earliest in the chromosome sequence. The start coordinate of features is always specified by column 4 of the GFF file, so:
$ cut -f 3,4 At_genes_subset.gff | sort -n -k 2 | head

chromosome	1
exon	3631
five_prime_UTR	3631
gene	3631
mRNA	3631
CDS	3760
protein	3760
CDS	3996
exon	3996
CDS	4486
Here we first cut out just two columns of interest (3 & 4) from the GFF file. The -f option of the cut command lets us specify which columns we want to remove. The output is then sorted with the sort command. By default, sort will sort alphanumerically, rather than numerically, so we use the -n option to specify that we want to sort numerically. We have two columns of output at this point and we could sort based on either column. The -k 2 specifies that we use the second column. Finally, we use the head command to get just the 10 rows of output. These should be lines from the GFF file that have the lowest starting coordinate.
Unit 44 - The end of the line
When you press the return/enter key on your keyboard you may think that this causes the same effect no matter what computer you are using. The visible effects of hitting this key are indeed the same…if you are in a word processor or text editor, then your cursor will move down one line. However, behind the scenes pressing enter will generate one of two different events (depending on what computer you are using). Technically speaking, pressing enter generates a newline character which is represented internally by either a line feed or carriage return character (actually, Windows uses a combination of both to represent a newline). If this is all sounding confusing, well it is, and it is even more complex than we are revealing here.
The relevance of this to Unix is that you will sometimes receive a text file from someone else which looks fine on their computer, but looks unreadable in the Unix text viewer that you are using. In Unix (and in Perl and other programming languages) the patterns \n and \r can both be used to denote newlines. A common fix for this requires substituting \r for \n.
Use less to look at the Data/Misc/excel_data.csv file. This is a simple 4-line file that was exported from a Mac version of Microsoft Excel. You should see that if you use less, then this appears as one line with the newlines replaced with ^M characters. You can convert these carriage returns into Unix-friendly line-feed characters by using the tr command like so:
$ cd ~/tutorial_materials/Data/Misc
$ tr '\r' '\n' < excel_data.csv
sequence 1,acacagagag
sequence 2,acacaggggaaa
sequence 3,ttcacagaga
sequence 4,cacaccaaacac
This will convert the characters but not save the resulting output, if you wanted to send this output to a new file you will have to use a second redirect operator:
$ tr '\r' '\n' < excel_data.csv > excel_data_formatted.csv
Unit 45 - This one goes to 11
Finally, let’s parse the Arabidopsis intron_IME_data.fasta file to see if we can extract a subset of sequences that match criteria based on something in the FASTA header line. Every intron sequence in this file has a header line that contains the following pieces of information:
- gene name
- intron position in gene
- distance of intron from transcription start site (TSS)
- type of sequence that intron is located in (either CDS or UTR)
Let’s say that we want to extract five sequences from this file that are: a) from first introns, b) in the 5’ UTR, and c) closest to the TSS. Therefore we will need to look for FASTA headers that contain the text ‘i1’ (first intron) and also the text ‘5UTR’.
We can use grep to find header lines that match these terms, but this will not let us extract the associated sequences. The distance to the TSS is the number in the FASTA header which comes after the intron position. So we want to find the five introns which have the lowest values.
Before I show you one way of doing this in Unix, think for a moment how you would go about this if you didn’t know any Unix or Perl…would it even be something you could do without manually going through a text file and selecting each sequence by eye? Note that this Unix command is so long that — depending on how you are viewing this document — it may appear to wrap across two lines. When you type this, it should all be on a single line:
$ tr '\n' '@' < intron_IME_data.fasta | sed 's/>/#>/g' | tr '#' '\n' | grep "i1_.*5UTR" | sort -nk 3 -t "_" | head -n 5 | tr '@' '\n'

>AT4G39070.1_i1_7_5UTR
GTGTGAAACCAAAACCAAAACAAGTCAATTTGGGGGCATTGAAAGCAAAGGAGAGAGTAG
CTATCAAATCAAGAAAATGAGAGGAAGGAGTTAAAAAAGACAAAGGAAACCTAAGCTGCT
TATCTATAAAGCCAACACATTATTCTTACCCTTTTGCCCACACTTATACCCCATCAACCT
CTACATACACTCACCCACATGAGTGTCTCTACATAAACACTACTATATAGTACTGGTCCA
AAGGTACAAGTTGAGGGAG

>AT5G38430.1_i1_7_5UTR
GCTTTTTGCCTCTTACGGTTCTCACTATATAAAGATGACAAAACCAATAGAAAAACAATT
AAG

>AT1G31820.1_i1_14_5UTR
GTTTGTACTTCTTTACCTCTCGTAAATGTTTAGACTTTCGTATAAGGATCCAAGAATTTA
TCTGATTGTTTTTTTTTCTTTGTTTCTTTGTGTTGATTCAG

>AT3G12670.1_i1_18_5UTR
GTAGAATTCGTAAATTTCTTCTGCTCACTTTATTGTTTCGACTCATACCCGATAATCTCT
TCTATGTTTGGTAGAGATATCTTCTCAAAGTCTTATCTTTCCTTACCGTGTTCTGTGTTT
TTTGATGATTTAG

>AT1G26930.1_i1_19_5UTR
GTATAATATGAGAGATAGACAAATGTAAAGAAAAACACAGAGAGAAAATTAGTTTAATTA
ATCTCTCAAATATATACAAATATTAAAACTTCTTCTTCTTCAATTACAATTCTCATTCTT
TTTTTCTTGTTCTTATATTGTAGTTGCAAGAAAGTTAAAAGATTTTGACTTTTCTTGTTT
CAG
That’s a long command, but it does a lot. Try to break down each step and work out what it is doing (you will need to consult the man page for some commands maybe). Notice that I use one of the other redirect operators < to read from a file. It took seven Unix commands to do this, but these are all relatively simple Unix commands; it is the combination of them together which makes them so powerful. One might argue that when things get this complex with Unix that it might be easier to do it in a programming language.
Summary
Summary
Congratulations are due if you have reached this far. If you have learned (and understood) all of the Unix commands so far then you probably will never need to learn anything more in order to do a lot of productive Unix work. But keep on dipping into the man page for all of these commands to explore them in even further detail.
The following table provides a reminder of most of the commands that we have covered so far. If you include the three, as-yet-unmentioned, commands in the last column, then you will probably be able to achieve >95% of everything that you will ever want to do in Unix (remember, you can use the man command to find out more about top, ps, and kill). The power comes from how you can use combinations of these commands.
| The absolute basics | File control | Viewing, creating, or editing files | Misc. useful commands | Power commands | Process-related commands |
|---|---|---|---|---|---|
| ls | mv | less | man | uniq | top |
| cd | cp | head | chmod | sort | ps |
| pwd | mkdir | tail | source | cut | kill |
| rmdir | touch | wc | tr | ||
| rm | nano | grep | |||
| | (pipe) | sed | ||||
| > (write to file) | |||||
| < (read from file) |